Contributed by Ellen Wright

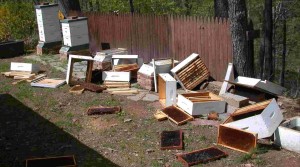
Apiary without a bear fence
Fencing is an important part of creating an apiary if you share your yard with bears. It is expensive and disheartening to have your apiary destroyed by one.
You can build an electric bear fence using a solar charger that delivers an annoying but safe shock. The key is to train the bears to avoid the fence – the fence itself will not deter a bear because the charge is not strong enough to penetrate the fur and skin. If you add a scent to one of the hot wires, encouraging the bear to investigate with his tongue or nose, he will learn to avoid the fence. I spread a tiny bit of peanut butter on the end of a strip of aluminum foil and roll the foil loosely over it. I wrap the other end over a hot wire. I have also used a tuna can hooked to the wire, but punch a hole in the can at the lowest point as it hangs on the wire or it will collect water and drown bees.
Planning the fence carefully is important. I have dug up and redone my fence twice now, once because my original location was too shady, and once to expand the apiary. Give yourself more space than you think you will ever need; it is a real pain to move hives… Try not to ‘line up’ your hives within the fence to discourage the bees from drifting between hives, and space the hives as far apart as you can. There are some good diagrams in the The Beekeepers Handbook for a horseshoe or S shape hive layout pattern. I like the horseshoe with the hives 3- to 5 feet apart and a work table in the center of the horseshoe. The hive entrances should be about 4 feet from the fence, or a bear may be able to reach through the fence and topple the hives.
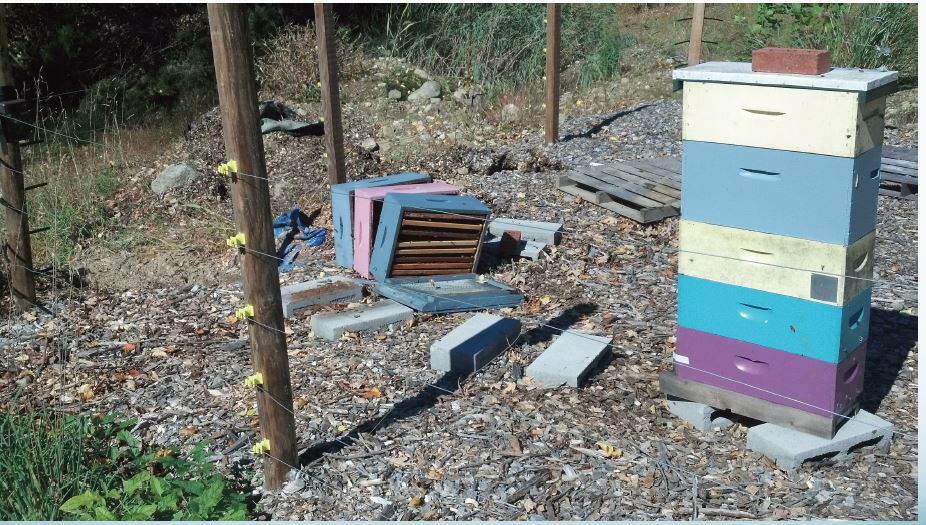
Hive toppled by a bear
Landi Simone gave a presentation on building a
Bear Fence for apiaries at the
Eastern Apicultural Society in 2013 that includes detailed instructions. This fence that is definitely more stable than mine, but the idea is the same. I used metal green farm fence posts with plastic insulators.
The fence can be 3 to 4 feet high with 5 wires alternating hot and ground with the top and bottom wire hot. The wires are about 6 inches apart. The bottom wire should 6 inches off of the ground to stop smaller creatures like skunks. (I also use nail boards in front of the hive to stop skunks and raccoons who figure out the fence. I have very persistent skunks.) Alternate the hot and gorund wires in this way to get the bear to touch both wires at once when investigating the bait.
Wood or green metal fence posts work well. Space the posts about 5 feet apart and use plastic insulators to keep the wires from touching the posts. You can angle the corner posts out to help keep the wire taut. The fence can be charged with a 0.1 Joule solar charge (Red Snap’r ). I’ve seen other recommendations for minimum 0.7 Joules.
Use two grounding rods pounded as deep as you can – 5 or 6 feet. The rods do not work if they are in dry ground, so they need to be deep enough to stay moist. I actually water mine in late summer when the bear is most likely to come around.
Connect the hot wires (top, middle, and bottom) together, and connect the ground wires to the grounding pole.
You should keep the grass/bushes etc from touching the wires because they may diffuse the charge. I learned that you should never put boards under the wires to keep the grass down! This will create the IDEAL yellow jacket nesting area.
Related