
Now that you’ve installed your NUC into a nest box, what comes next? When and how do you do your first inspection?
It’s best to leave the bees alone for at least 2 weeks after installation, except to add more syrup as necessary. I prefer using jar feeders above the inner cover because there is little disturbance to the hive when you refill.
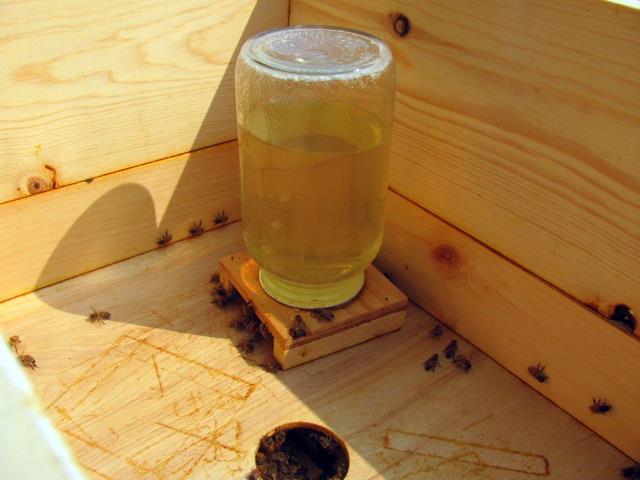
Feeding syrup in a Mason jar with tiny holes in the lid. The stand has just enough space for the bees to feed under the jar. (Courtesy of Barbara Jones)
Time your inspection between 10 AM and 2 PM and > 65 degrees when the foragers are flying. Earlier and warmer within that range are best.
Take a few minutes to observe the entrance – you can learn a great deal about the health of your hive just watching the front entrance.
- Are the bees bringing in pollen? If so, there is a good chance that the hive is queen-right and is feeding brood.
- What is the activity level? Grand Central Station or just a few bees coming and going?
- Do you see guard bees checking out the traffic? They hang out at the entrance and tend to raise their front legs and antennae.
- Do you see any drones? A healthy hive will produce a good many drones in the spring.
- Are there any bees with shriveled wings? Deformed wing virus is a sign of a Varroa mite infestation.
- Are there bees flying in spirals in front of the hive, and facing it while hovering, especially in the early afternoon? These are bees beginning their forager stage on an orientation flight.
- Heft the hive and estimate weight. This will tell you if they are building up good honey stores.
Always have a plan as to why you are inspecting. I’ll assume for this description that you are doing a quick check to see if the hive is queen- right and to check on their progress building up after a NUC installation. Your plan then is to
- spot evidence of the queen as quickly as possible,
- check for swarm cells,
- count the frames of bees to see how much they are building out,
- add a pollen patty if the one you added when installing the NUC needs replacing,
- add a second nest box if you did not do so when installing, and
- refill the sugar syrup if necessary.
Move as slowly and gently as you can throughout the inspection. Bumping and knocking will upset the bees. One of my mentors used to describe it as moving as if you were in molasses.
Once you’ve gotten a sense of the state of the hive at the front door, put a few puffs of smoke at the entrances to block the alarm pheromone of the guard bees. Raise the lid just a little (or use the ventilation holes in a Vivaldi inner cover) and put a few puffs there too. Wait about 30 seconds. Note that while you should always have a smoker ready when you are doing an inspection, some people prefer not to use smoke and instead spray the bees lightly with a warm 1:1 sugar solution.
Slowly lift the lid – lift the side away from you in case any bees zoom out. Check the lid for the queen! It is rare that she would be there, but it happens. You can prop the lid against the entrance so any bees can crawl back into the hive. I sometimes put the lid upside down on the ground or on a table near the hive and use it to stack the boxes I remove. If there are lots of bees on the inner cover, you can use a few more smoke puffs to move them down. You may need to shake bees off of the syrup bottles when removing them. I like to limit the smoke because it irritates the bees.
Remove the Vivaldi cover or inner cover and place it against the front of the hive, or right side up on the hive top – but skew it so that it is resting on the edges of the top (assuming a telescoping lid). Make sure it’s securely set so that you can put other boxes on top safely. If you put the Vivaldi or inner cover inside the top, it can stick.
Log the number of frames covered with bees on the top hive box.
Spritz with 1:1 sugar water to distract the bees and remove the box and place on the Vivaldi. Do this until the bottom-most box is still on the stand (in this example you will probably only have the one or two nest boxes, so you are removing the top one and inspecting the bottom one first.)

Cover the top of the removed box stack with a (dampened in summer) ‘manipulation cloth’ to calm the bees and reduce flying. I use a canvas painter’s floor cloth cut into fourths.
Alternatively, you can set the hive boxes you remove on the short side on the ground. With this method, it is easy to look on the bottom of the frames for queen cells and take a quick look between the frames.Log the frames of bees on the bottom nest box.
Use another dampened cloth to cover the far side of the bottom box. From the near side of the hive, carefully remove the frame closest to you and put on the frame rest – or rest it on the edge on the ground leaning against the stand.
Pry the frames apart at the side and slide them toward you until you reach the center one. Move that frame away from the next one and gently remove and inspect – remembering to hold the frame over the hive box in case the queen drops off. The queen may well be on the frame and you don’t want to roll her.
Check for larva or eggs. If you see them, the queen has been there within 3 (eggs) to 8 (larva) days. Given your goals for this inpection, there is no need to check other frames.

If you don’t see larva or eggs, check the frames on each side of the center one. Remember to look for swarm (queen) cells at the bottom of each frame you pull. Note the amount of honey and pollen and the brood pattern as you work BUT as soon as you see eggs or larva, close the hive.
When you finish with the box, if you have not checked the frame bottoms for swarm cells yet, use your hive tool to loosen it from the bottom board, slide it a bit towards the back, and ‘hinge’ it to do a quick check for swarm cells.
Remember to make sure that the eight frames are snug together in the center of the 8 frame box – there will be some extra space between the outer frames and the side of the box. This extra space helps to have room to remove the outer frame easily when inspecting. If you do not snug the frames together in the center of the box, the bees can build brace comb or wonky comb between the frames.
Place the pollen patty over the frames with brood on them. I tear a bit of the paper off on the bottom side and tear them in half, but the bees can handle it themselves if you forget.
Move the top box on the stack of removed boxes back on to the hive. Hinge it and look for swarm cells. Gently set it down and note the number of frames covered with bees. If you did not see eggs or larva in the first box, check this one. Otherwise, add the inner cover (Vivaldi) and viola – you are done with your quick check.
 Log the date, time, temperature, time in the hive, number of frames of bees, whether it was eggs or larva you spotted, and anything else of interest. It’s best to log your inspection right away – it is very easy to forget what you noticed in the hive – especially if you have more than one hive to inspect.
There is no rush in doing the first inspection of a newly hived colony. Wait for a day where the temperature and weather are ideal. Bees do not like cloudy or windy weather, and they are cranky in the late afternoon when all the foragers are back home.